Create profile lines or cross sections from a point cloud
Initiating Profile Calculation
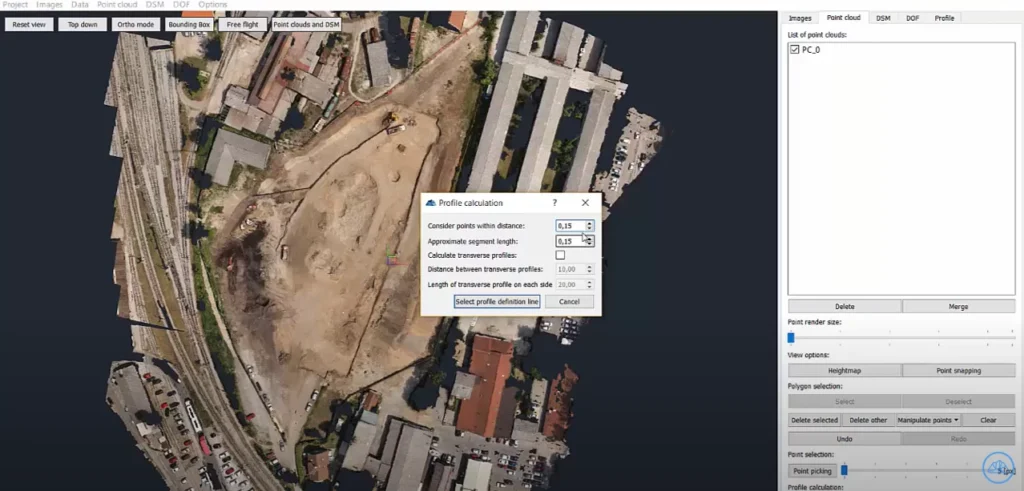
To create a profile from a calculated point cloud just click ‘Calculate profile’ button and set parameters for profile line generation.
Setting Profile Parameters
First, define the distance between the profile definition line and added points – it’s kind of a buffer zone. If the point cloud reconstruction is done on level 1 or 2 keep it at 0.15m, if it’s done on level 3 or more set it to 0.3m.
Next, define a segment line. We advise you to start at 0.15m, test it, and if you are not satisfied with the result change the segment parameter to a higher or lower number.
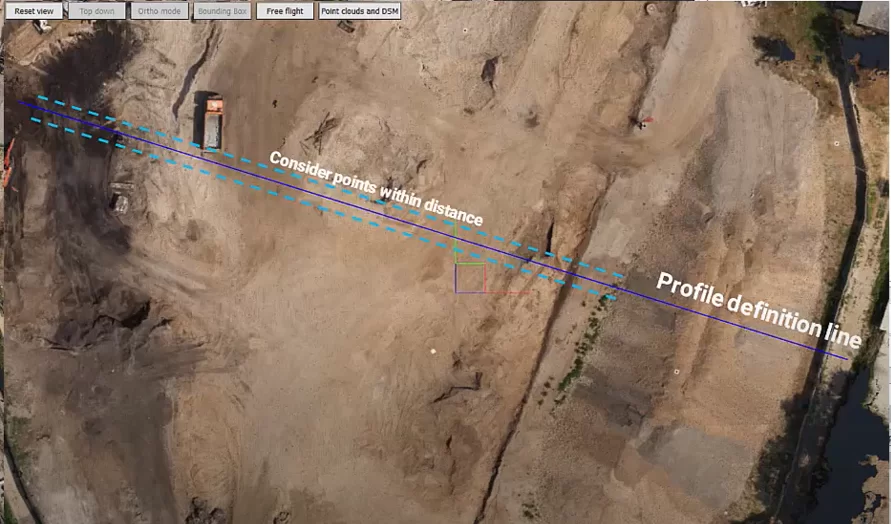
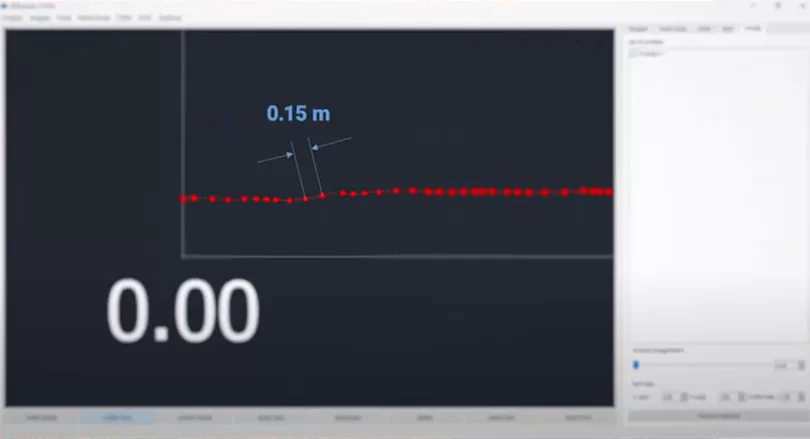
Set the distance
Recommended 0.15m distance
Creating a Simple Profile
The first option is to create one simple profile – leave the ‘Calculate Transversal Profiles’ box unchecked and click the ‘Select profile definition line’ button. That will put the point cloud viewer to Top down and Ortho mode.
Select the profile definition line with a left mouse click, finish the selection with a right mouse click, wait a couple of seconds and the profile line is created.
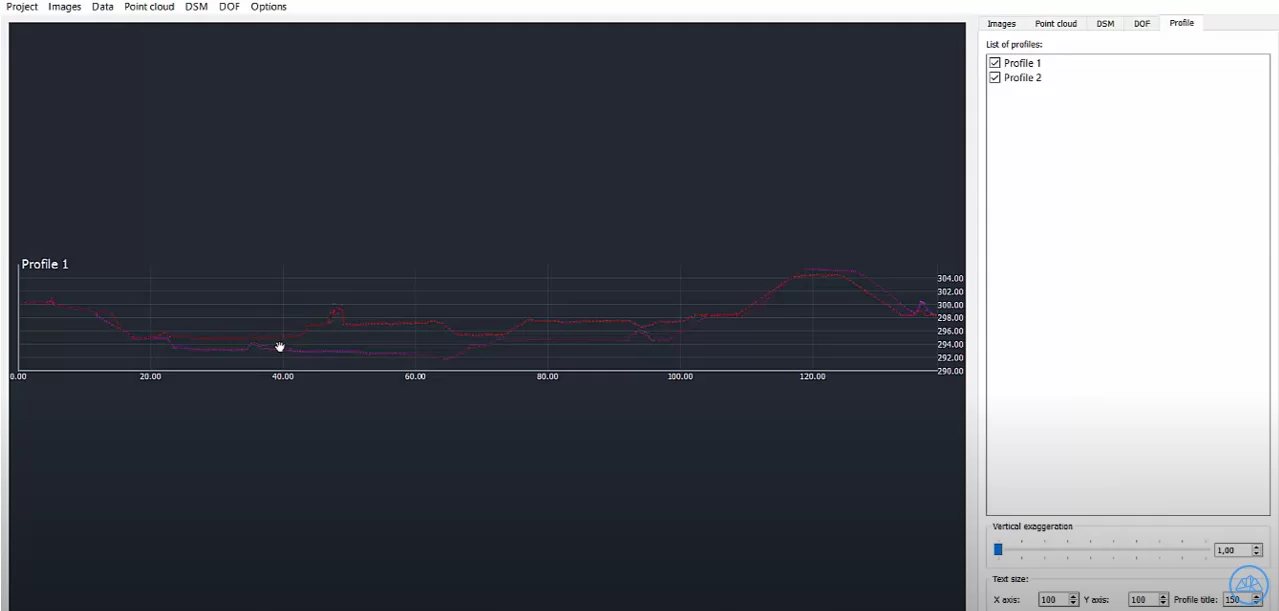
Accessing and Modifying the Profile
You can access the calculated profile via the point cloud tab, DSM tab, orthophoto map and Profile tab. There is an option to manipulate profile data.
You can change the text size for X axis, Y axis or Profile title.
You can rename the profile by double clicking the profile name.
Reconnect the anchor point by left mouse clicking the 2 red dots and Reconnect button or the R key on your keyboard.
Move the anchor point by drag & dropping it or delete it with left mouse click selection and delete button on your keyboard.
You can turn off profile point, profile lines or anchor points.
You can change the scale between X and Y axis.
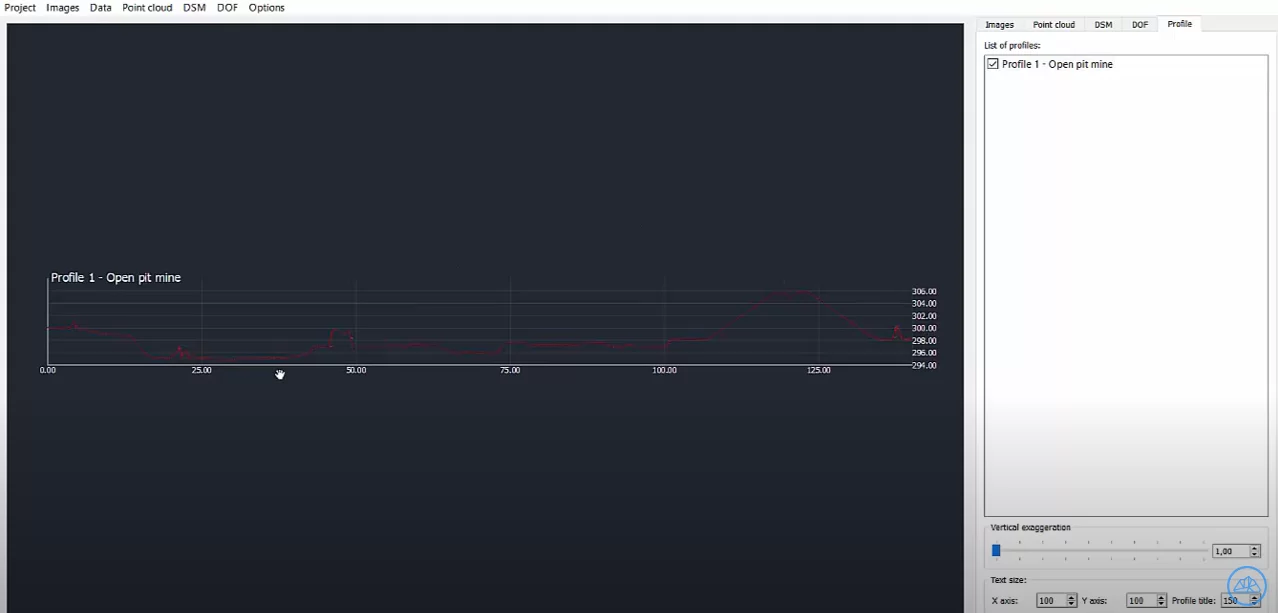
When you are pleased with your profile section graph you can export it to DXF or PDF. The result we have here is in pdf.
Profile 1 – Open pit mine
pdf export
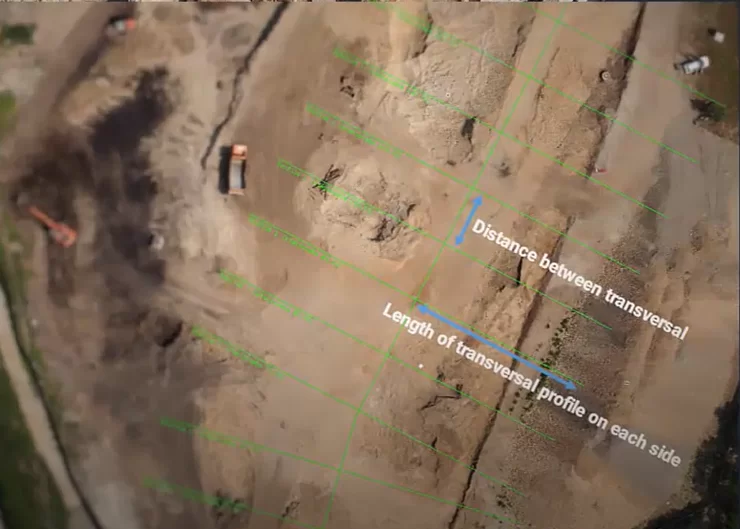
Generating Transversal Profiles
The second option is to check the ‘Calculate Transversal profiles’ box and create transversal profiles.
Set the distance between profiles (e.g., 10m) and the profile length on each side (e.g., 30m).
Click ‘Select profile definition line’ – left mouse click to start the selection, right mouse click to finish it. Give it a few moments and you’ll see the transversal profiles or section lines automatically generated based on selected parameters.
Transversal profiles
Compare profile lines of 2 point clouds of same area
Visualizing Profiles
View the transversal profiles on the Orthophoto Map and in the Profile tab. You can manipulate profiles similarly to single profiles. Don’t forget that you can use the same set of functionalities all around.
Working with Multiple Point Clouds
Enable multiple point clouds to generate profiles across different data sets. The process remains the same, and the differences between point clouds will be displayed.