Preserving Architectural heritage with 3Dsurvey – Castle of Sobota
Key takeaways
The Castle of Sobota (13th century) was documented in 3D to help preserve its architectural heritage during renovation.
Drone photogrammetry was flown in a double‑grid at 50 m altitude with 5 ground control points to ensure accuracy.
The 3D point cloud was classified into ground vs. structure to create a Digital Terrain Model (DTM) for precise reference.
In the CAD module, bounding boxes were used to isolate only the roof area, simplifying drawing.
Three CAD layers were created: outer roof boundary, atrium boundary, and roof breaklines — capturing complex roof geometry.
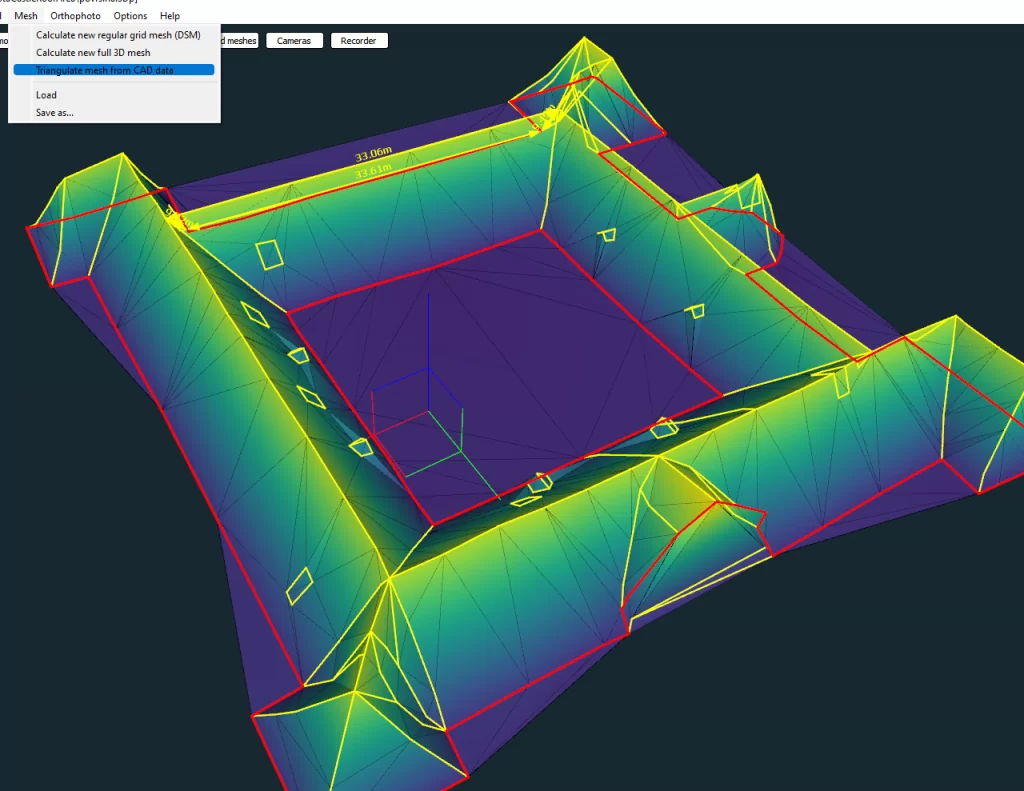
A triangulated mesh was generated from the CAD outlines to represent the roof surface accurately.
The 3D area of the castle roof (excluding the atrium) was calculated as ~2,993.34 m² using volume calculation tools.
The workflow took less than half a day: drone flight (~15 min), data processing, CAD drawing, and area calculation — making it efficient and precise for heritage projects.
Introduction
Architectural Heritage is of increasing significance to society. Evidence of past societies can provide a sense of belonging and security to modern societies and be an anchor in a rapidly changing world. In many societies, too, heritage can be an important definer of identity. Understanding the past can also be of great help for managing the problems of the present and the future.
Castle of Sobota
The “UNESCO 1972 World Heritage Convention” indicates cultural heritage as monuments, groups of buildings, and sites etc., and the Castle of Sobota in Slovenia is one of those buildings. The castle dates back to the 13th century, and was sold to the municipality in the 1930s. Throughout the centuries, the castle underwent several reconstructions, reflecting Renaissance and Baroque architectural elements. Since 1956, it has housed the Regional Pomurje Museum.
As with all old buildings, maintenance and renovation is often required. It is not always possible to preserve Architectural heritage in its original setup, but it can be replicated quite similarly – with the help of surveying!
Project Overview
In this article, we focus on roof construction substitution, where the client wanted to understand how they can make use of 3Dsurvey in order to measure a 3D area of the roof of the Sobota Castle. The castle’s roof needed to be renovated, and the stakeholders needed to know the total roof area so that they could order the exact quantity of roof tiles necessary. The other important task was architectural heritage preservation – to preserve the design, look and feel and architecture when the roof is renovated.
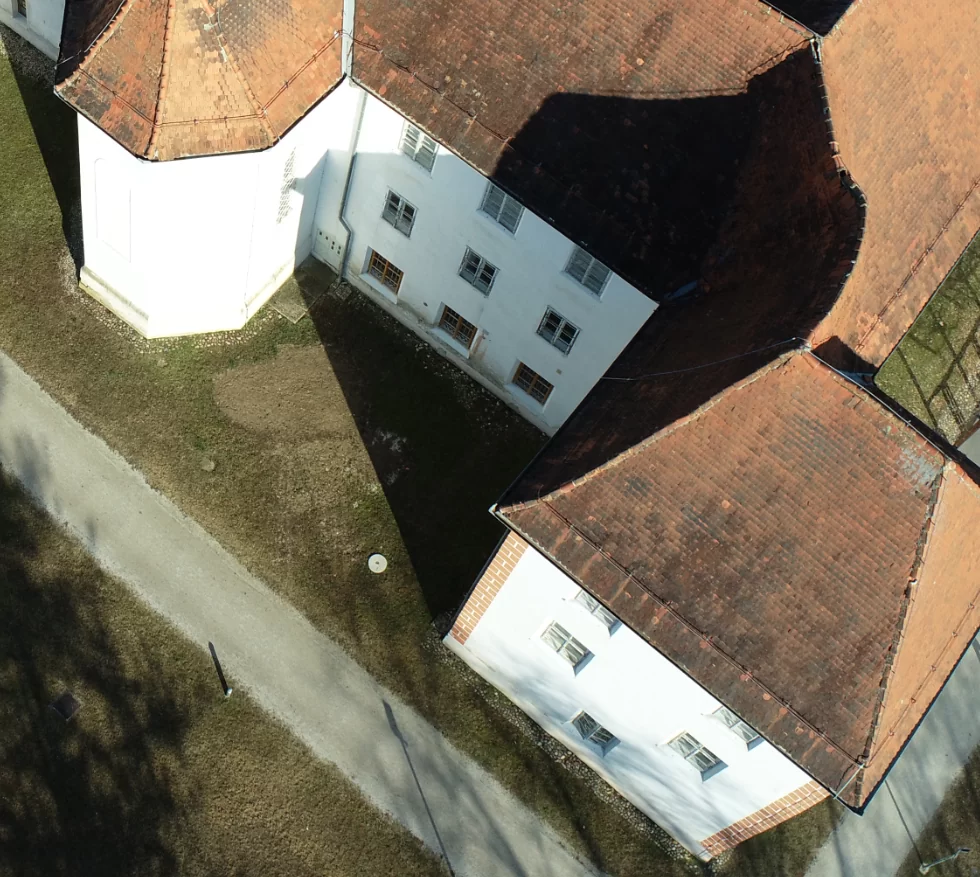
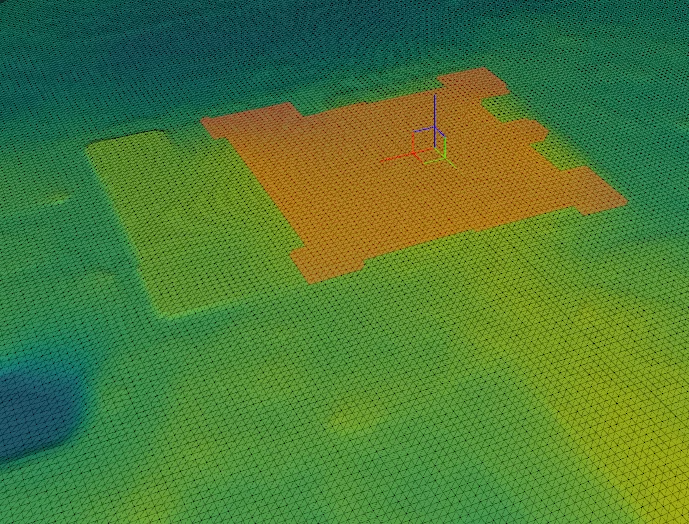
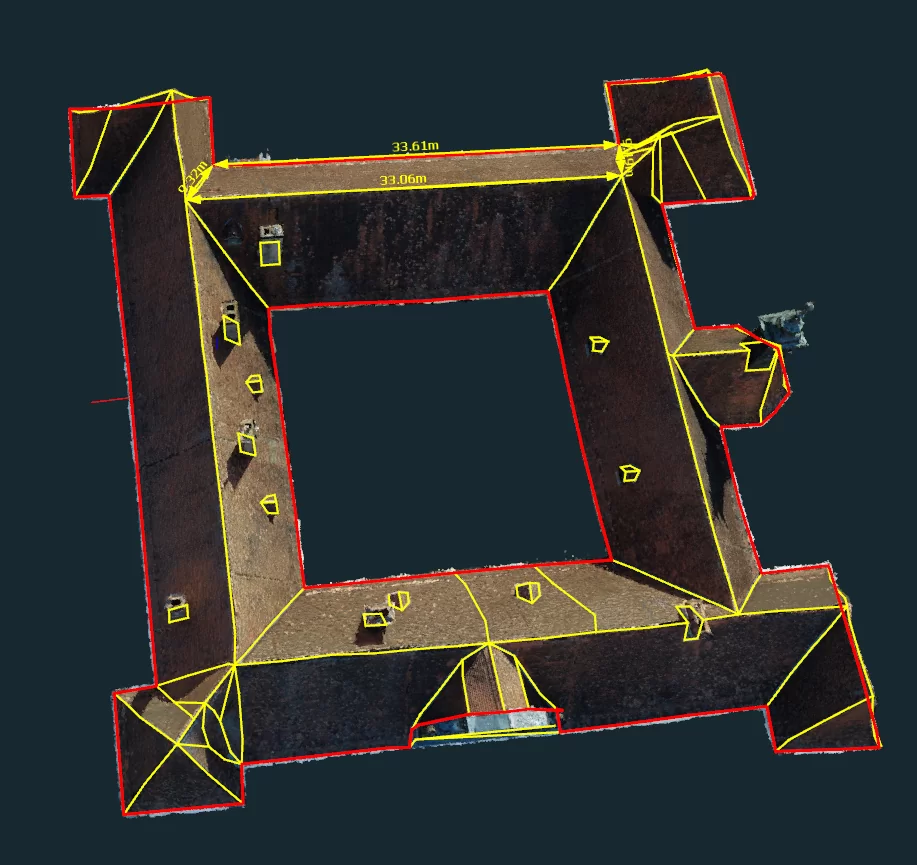
The problem might seem elementary; however, it is not exactly so. A castle is an old object, and its roof has an irregular shape as you can see below:
Irregular shaped roof
Data Acquisition
To get the best possible 3D model of the castle, our client mapped it in double grid mode with camera pitch of 60 degrees downward at a flight altitude of 50m. They placed 5 ground control points around the castle area as they wanted to achieve the best possible accuracy (in this case RTK telemetry alone would offer sufficient model accuracy):
Telemetry
Workflow
As in most cases, standard processing workflow in 3Dsurvey was used. The workflow offered is designed by the surveyors, so in 97% of the cases, users do not need to change the steps as they can just follow an intuitive workflow by design.
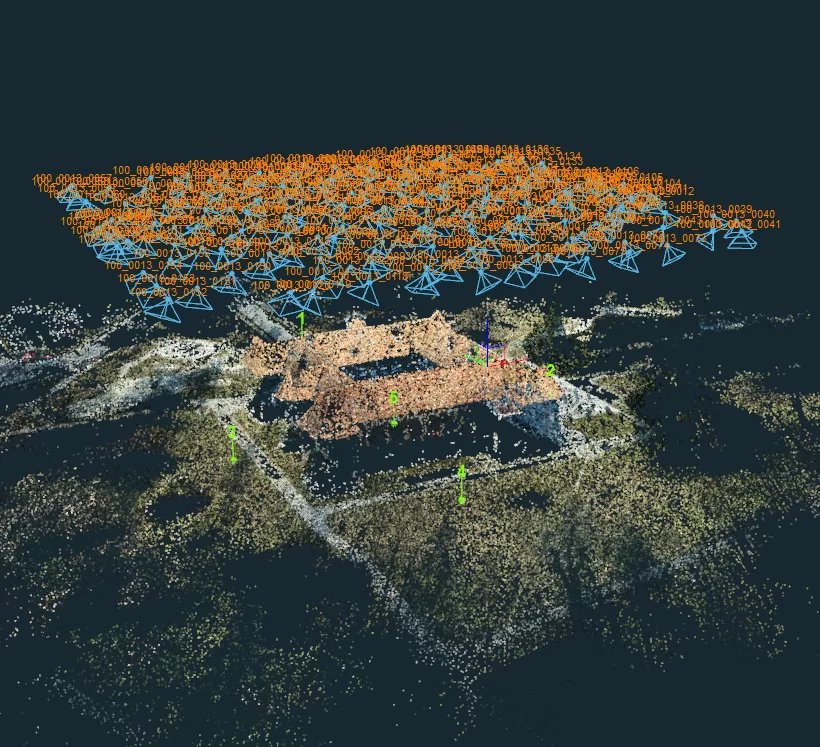
Bundle adjustment on aerial images
Orientation
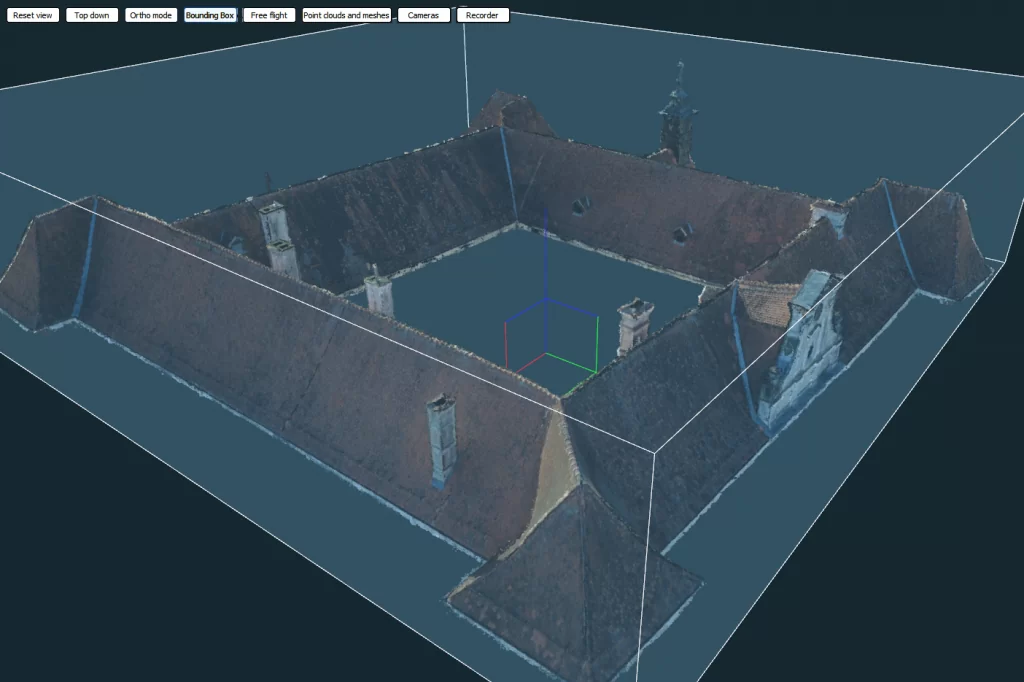
Point cloud calculation of complete castle (this one is especially nice):
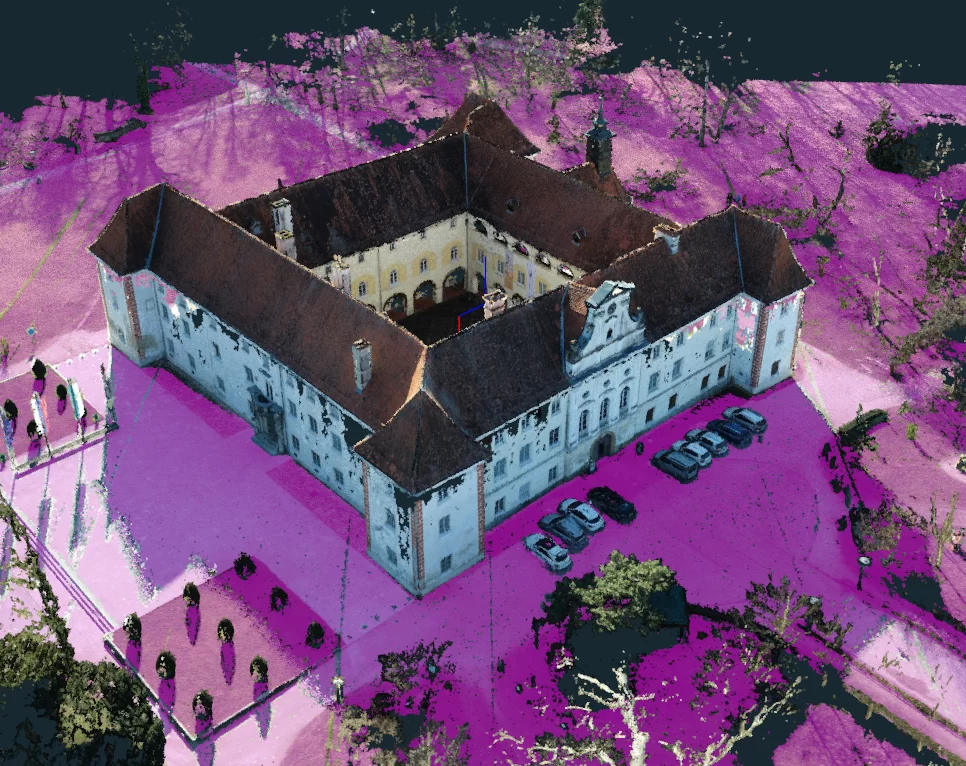
On the point cloud, they classified ground points first:
Ground points classified
Out of the ground points, they were able to make a Digital terrain model of the castle area:
Digital terrain model
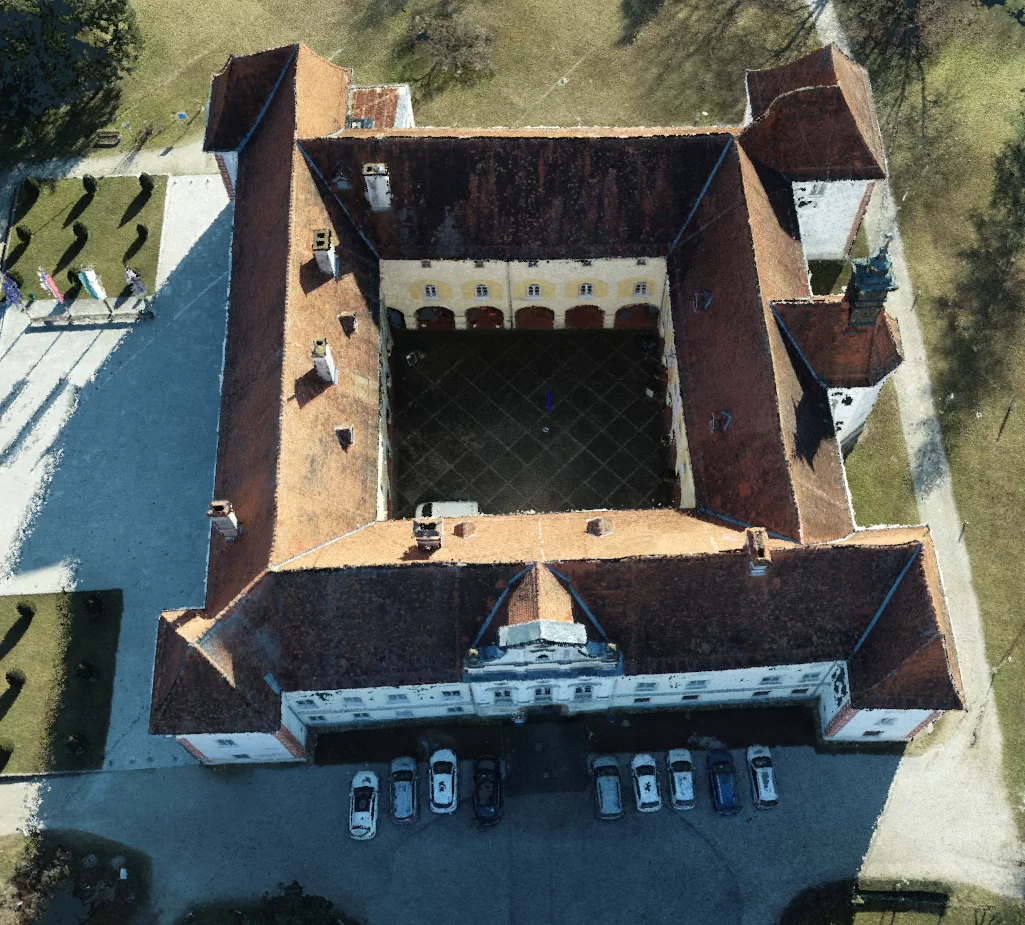
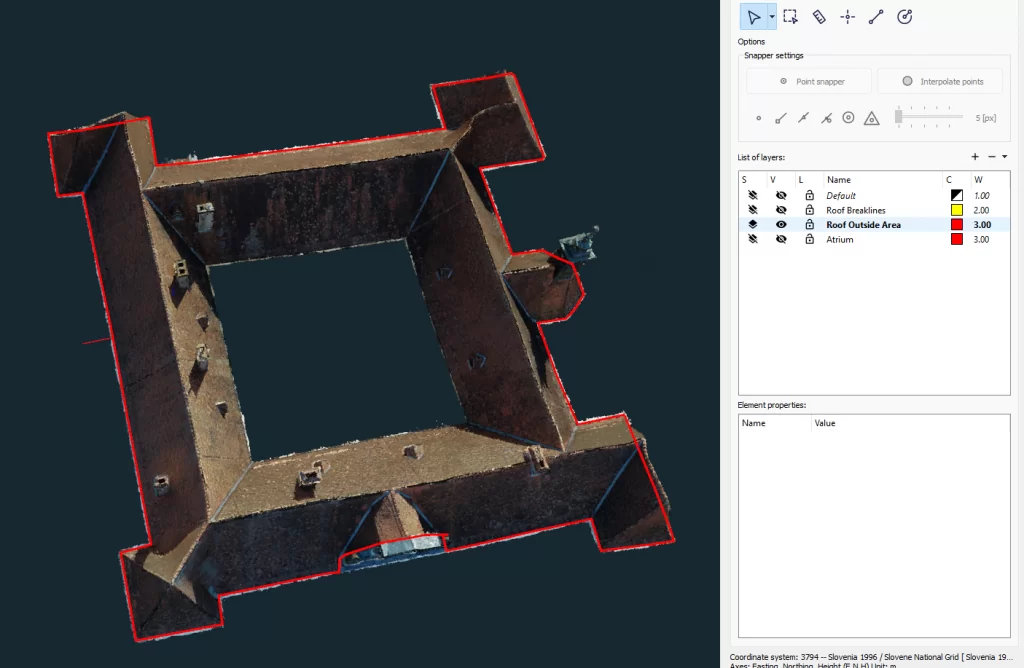
Then they went into the CAD section of 3Dsurvey. To simplify the CAD drawing, they manipulated the Bounding box so that only the castle roof was shown:
Bounding box
They prepared 3 layers in CAD: Roof Outside Area, Roof Breaklines and Roof Atrium Boundary:
CAD layers
On Roof Outside Area boundary, they drew the outside boundary of the roof area:
Outer roof boundary
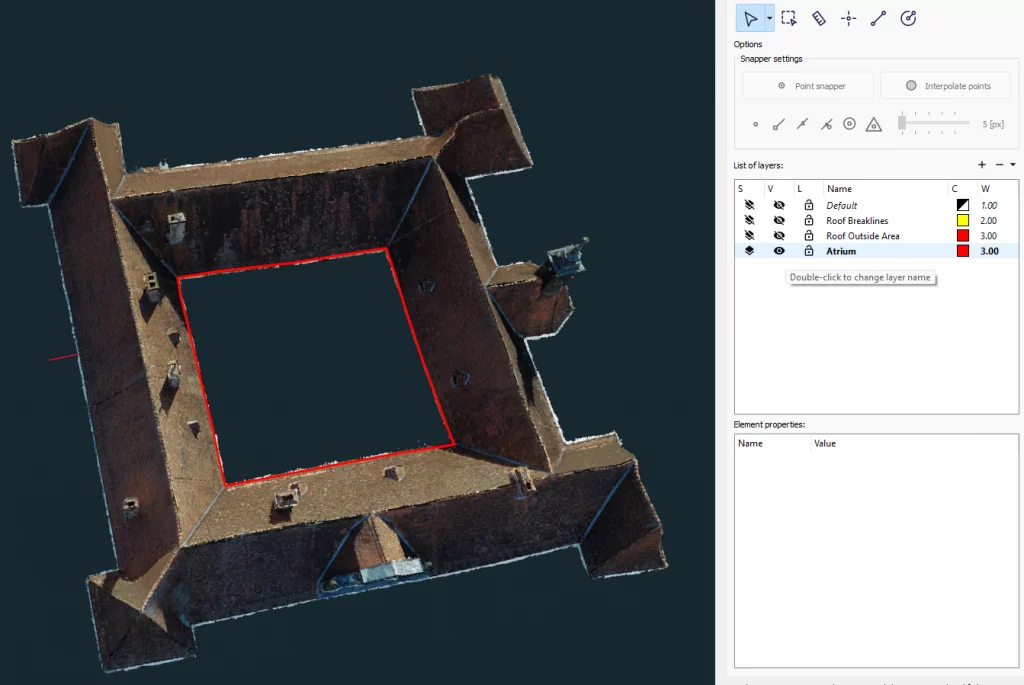
On Atrium layer, they drew the inside border of the roof Area:
Inner roof boundary
Then finally on Roof Breaklines layer they drew all the breaklines for the roof:
Roof breaklines
The final CAD drawing looked like this:
Final CAD drawing
They then used Triangulate CAD data to make a mesh 3D model of the roof:
3D mesh
Now everything was prepared to calculate the roof area.
Calculating the roof area
To calculate the 3D area of the roof, they made use of Calculate volume function because calculate volume function returns 3D area as well. Future versions of 3Dsurvey will include standalone calculate 3D area of mesh function, but until then, using calculate volume function will offer a good alternate workflow.
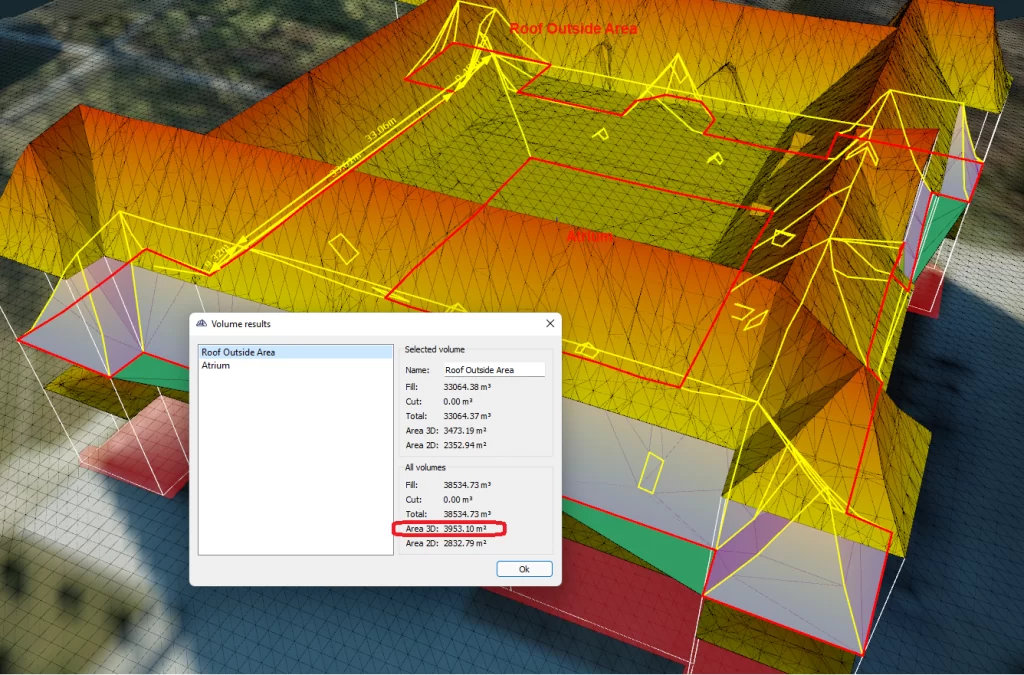
When calculating volume they used Digital terrain model as Initial surface. Triangulated Mesh from CAD data surface as Final surface. In the volume calculation window, they chose From CAD option, and selected layers Roof Outside Area and Atrium:
Volume calculation
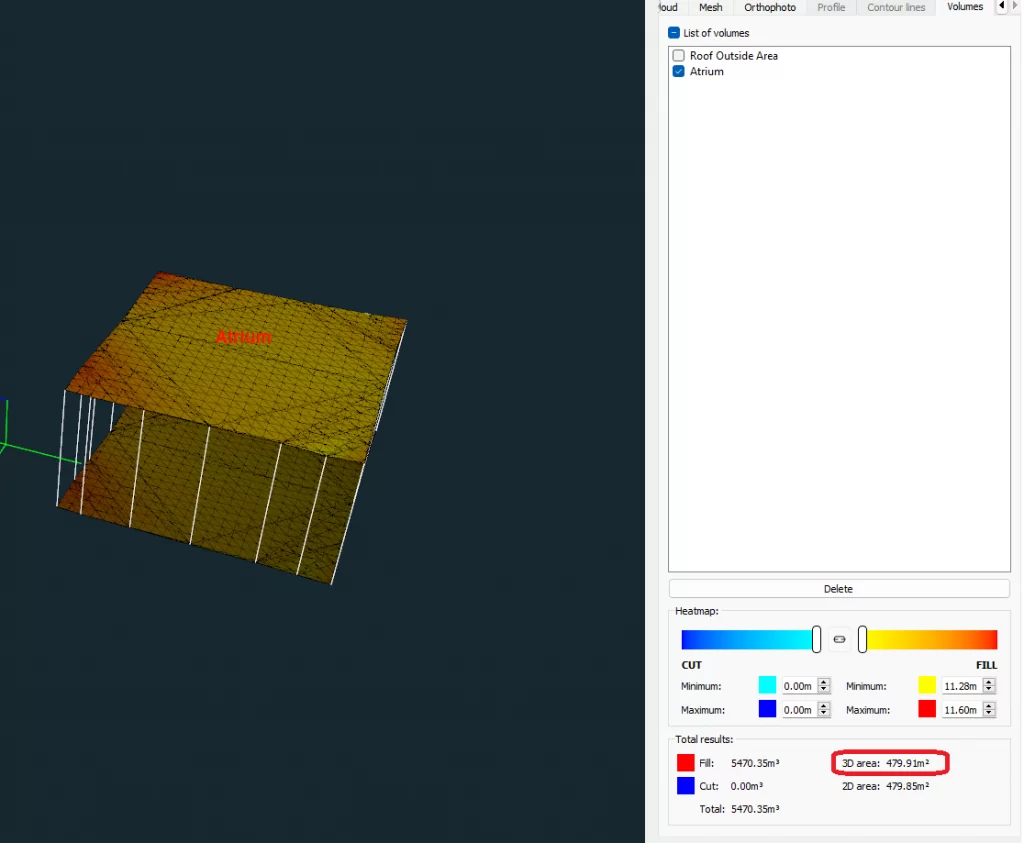
The result of this operation was two volumes – volume and 3D area for Roof Outside Area, and volume and 3D area for Atrium area:
Volume results
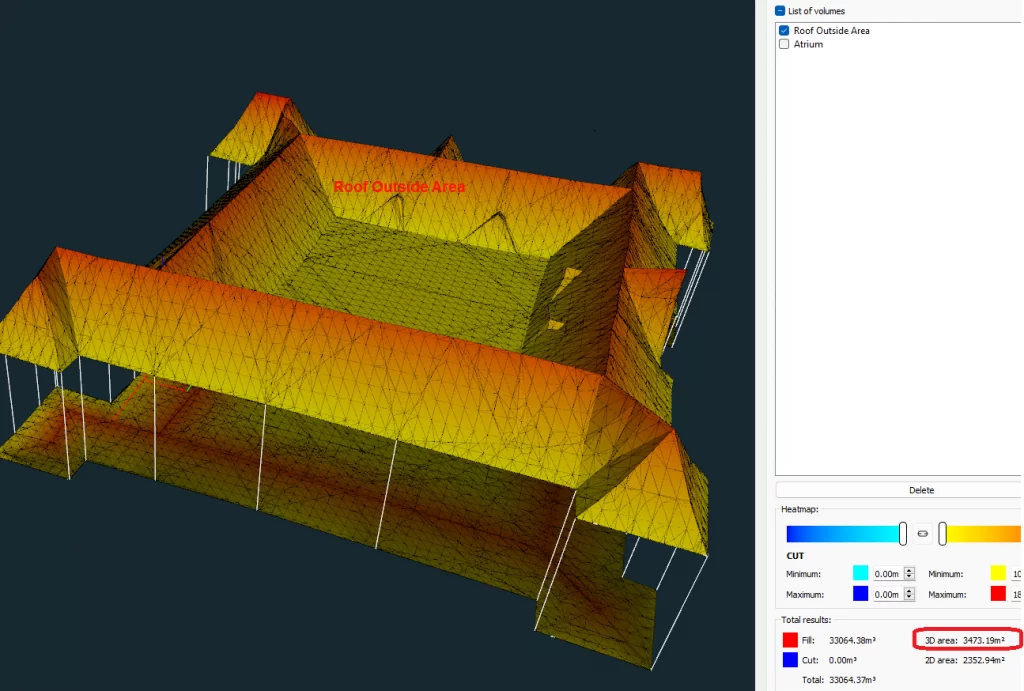
This was now the completeRoof Outside Area 3D area:
Complete 3D area
And this is how the Atrium 3D area and volume looked like:
Atrium data
The Total Roof 3D area was the difference between the two 3D areas, so Roof Outside 3D Area 3D area (3473.19 m^2) minusAtrium 3D Area (479.85 m^2):
3D Castle roof area = 3473.19 m^2 – 479.85 m^2 = 2,993.34 m^2
Using traditional roof measuring techniques would have been near impossible to do accurately as the area of this roof was more complex. With help of 3Dsurvey and drone photogrammetry, however, the task was relatively easy and significantly user friendlier than traditional approaches.
Recap steps needed to calculate 3D area
Again, we quickly recap the steps needed to calculate the 3D area:
Record aerial images of object of interests
Import the images in 3Dsurvey, run Bundle Adjustment and calculate dense point cloud
Classify the point cloud and produce Digital terrain model
In CAD draw the outer boundary of object of interest and put it on layer Outer boundary
In CAD draw the inner boundaries of object of interest (in our case Atrium Boundary)
Draw object Breaklines
Calculate the Triangulated mesh surface out of outer and inner boundaries and Breaklines
Calculate the volumes with DTM as initial surface and triangulated mesh as final surface. For area definition use inner and outer boundary CAD layers.
The final volume is the difference between 3D Area of Outer boundary minus 3D Area of inner Boundaries
This can easily be performed in less than a day.
Total terrain work will take less than one hour. Drone flight will take about 15 minutes. The rest of the time will be spent on unpacking, setting up, packing the equipment. Then the processing in 3Dsurvey, after point cloud is completed, will again take about one hour. We will need to draw CAD boundaries and then calculate the volumes.
In short, this kind of project will take about half of the day, when we count in travel to and from the site as well.