

Creating virtual reality with photogrammetry and 3Dpro
The Project
Creating 3D digitization of a historic building using photogrammetry. The end project was to create an interactive 3D model of a high school building for students to virtually explore and walk through. The company, 3Dpro, wanted to create the outer model using photogrammetry.
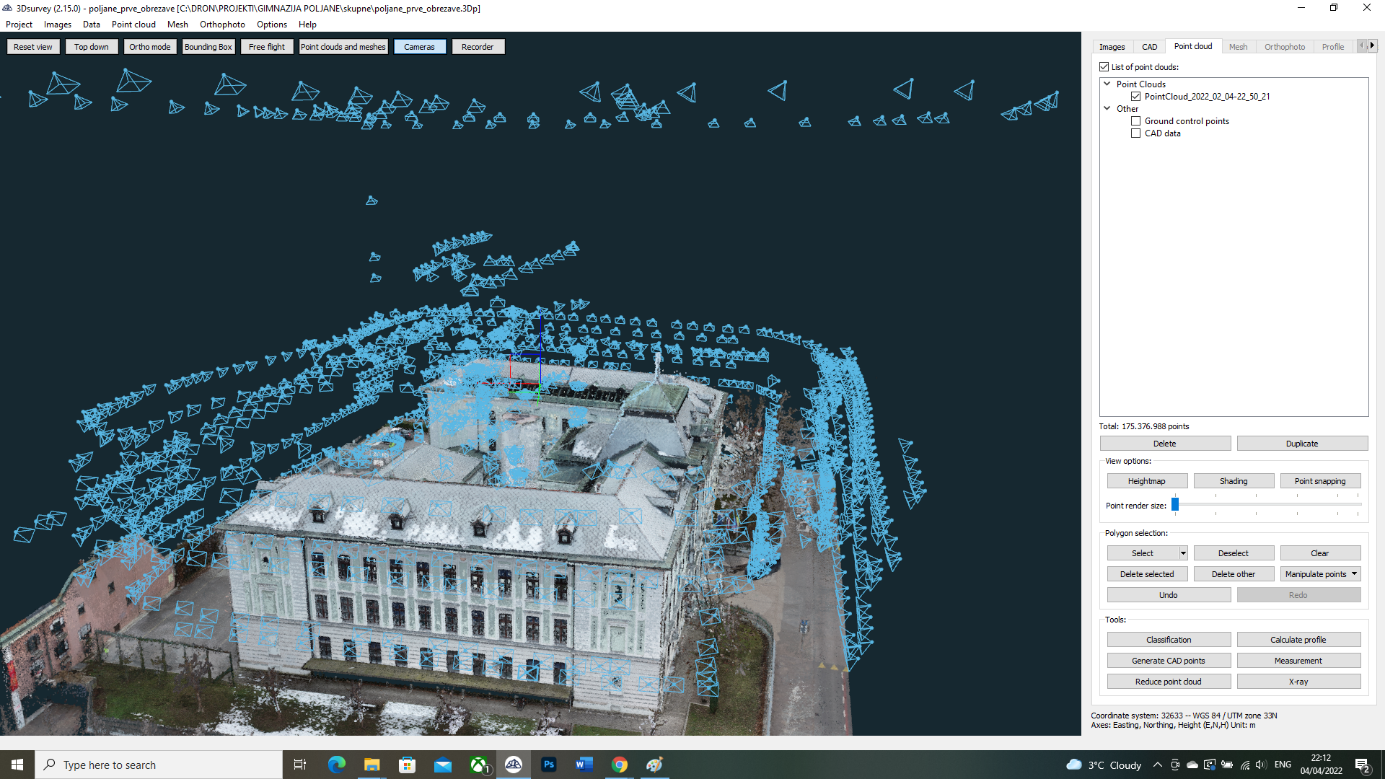
The building in question, Gimnazija Poljane in Ljubljana, is reasonably large, with countless details inside and outside of the building. It required significant planning to achieve the desired results. There were several steps involved, from acquiring the data to posting the final product to the web page for the users to see and use.
The models are to be used for as-built documentation, validation of restoration work, detailed photorealistic renderings, and web visualization of the building.
First steps
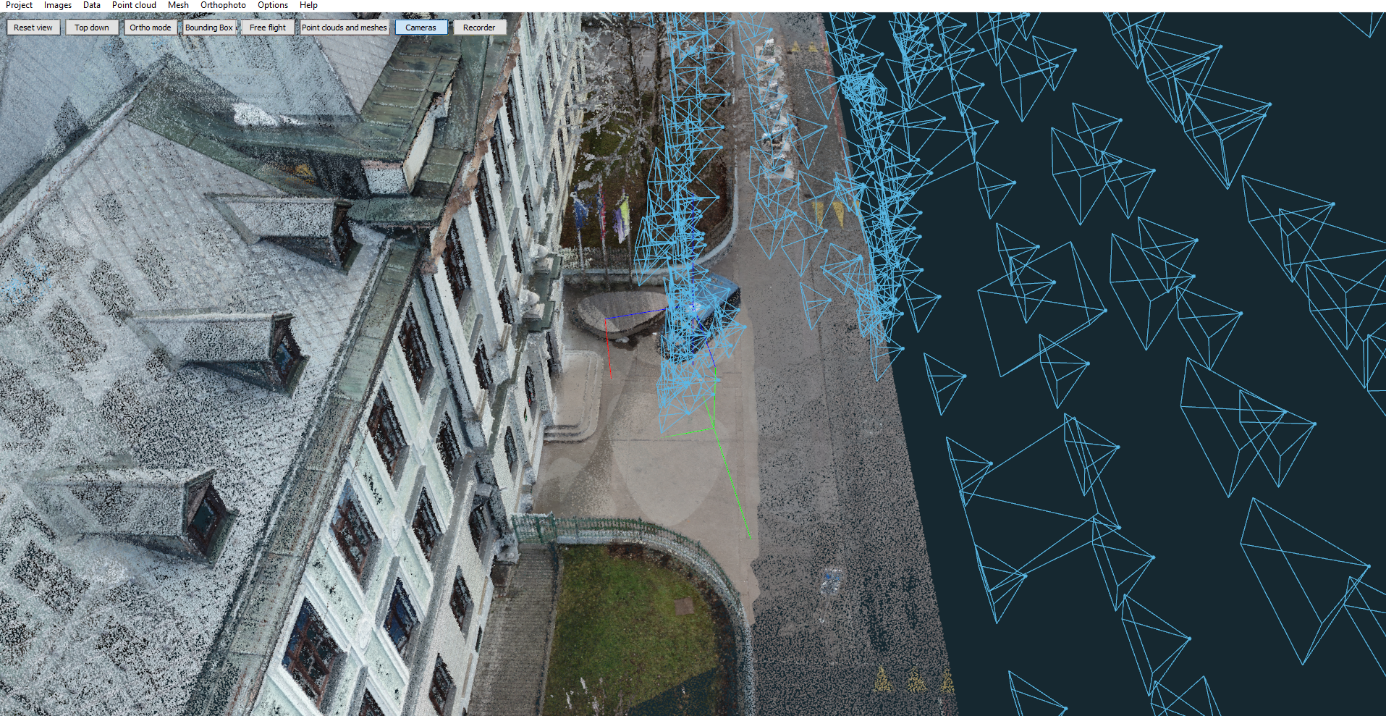
Acquiring images is the first step. You need to make sure that coverage of pictures is at least 80%, while choosing the appropriate angle of the camera. In our case we were using several different angles (90 degrees, 80 degrees, 70 degrees and 60 degrees). Also, do not forget to turn on the camera georeferencing functions.
For this specific project we really wanted to get state-of-the-art results. Therefore for the external 3D model we captured 1550 images altogether with an average size of 10 MB per image. It took us 2 days to capture all these images due to bad weather at that time – catching the cloudy days to make sure that the lighting was most consistent. And first part of the job was done!
Processing
Once you get the hang of it, the process is nice and easy, and very straightforward. First, we uploaded the captured images into the 3Dsurvey. Then we needed to select the known coordinates and run the bundle adjustment.
Since we were dealing with a lot of material, and wished for as realistic model as possible, we selected the ‘hybrid mode’, which brings out the best from Global and Incremental mode.
It ran on a 128 GB RAM, RTX 3080ti for a few hours. We selected the maximum of 16 CPU workers and 20.000 maximum detected features. The feature detection level was set to High.
The final step to create the photorealistic model was the ‘reconstruction’ option which was set to High as well. We set it running during the night and it took around 10 hours to complete.
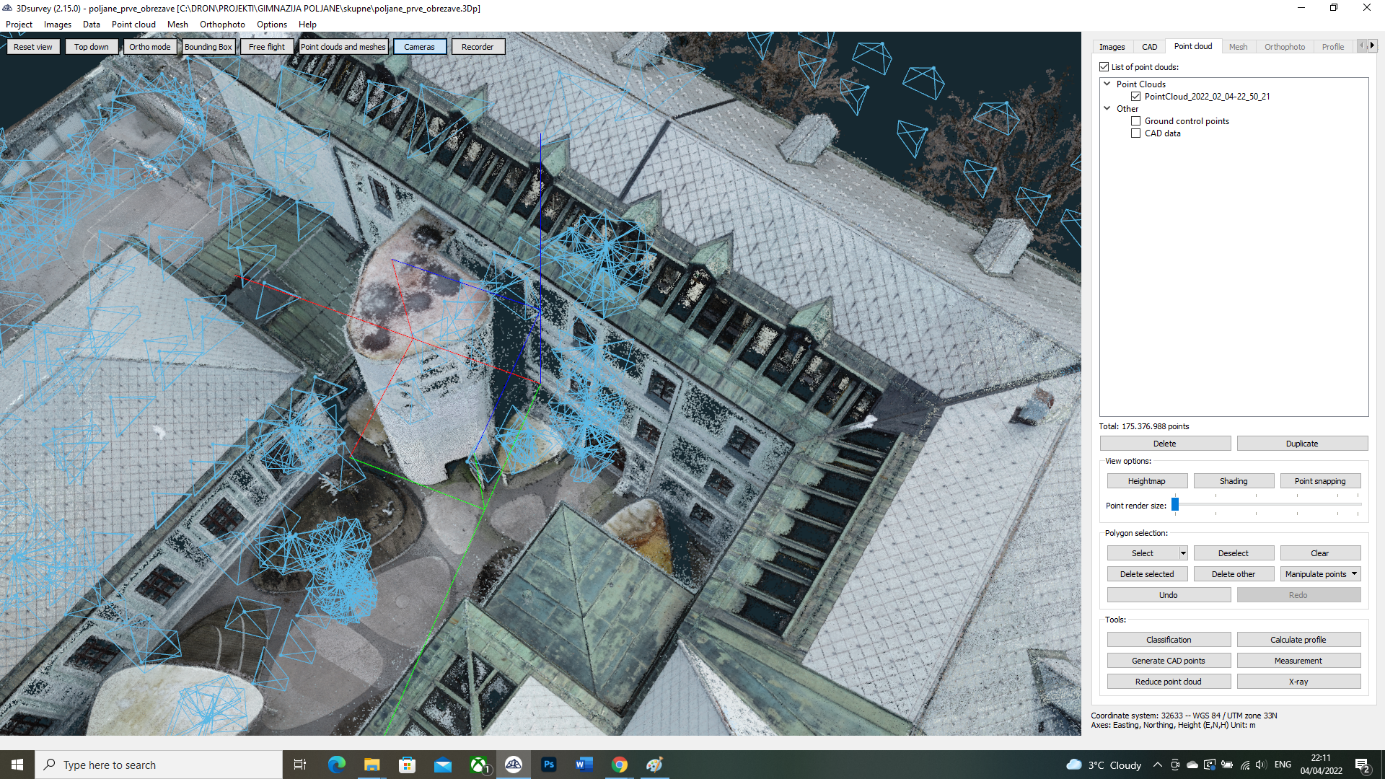
Recommendations for scanning facades
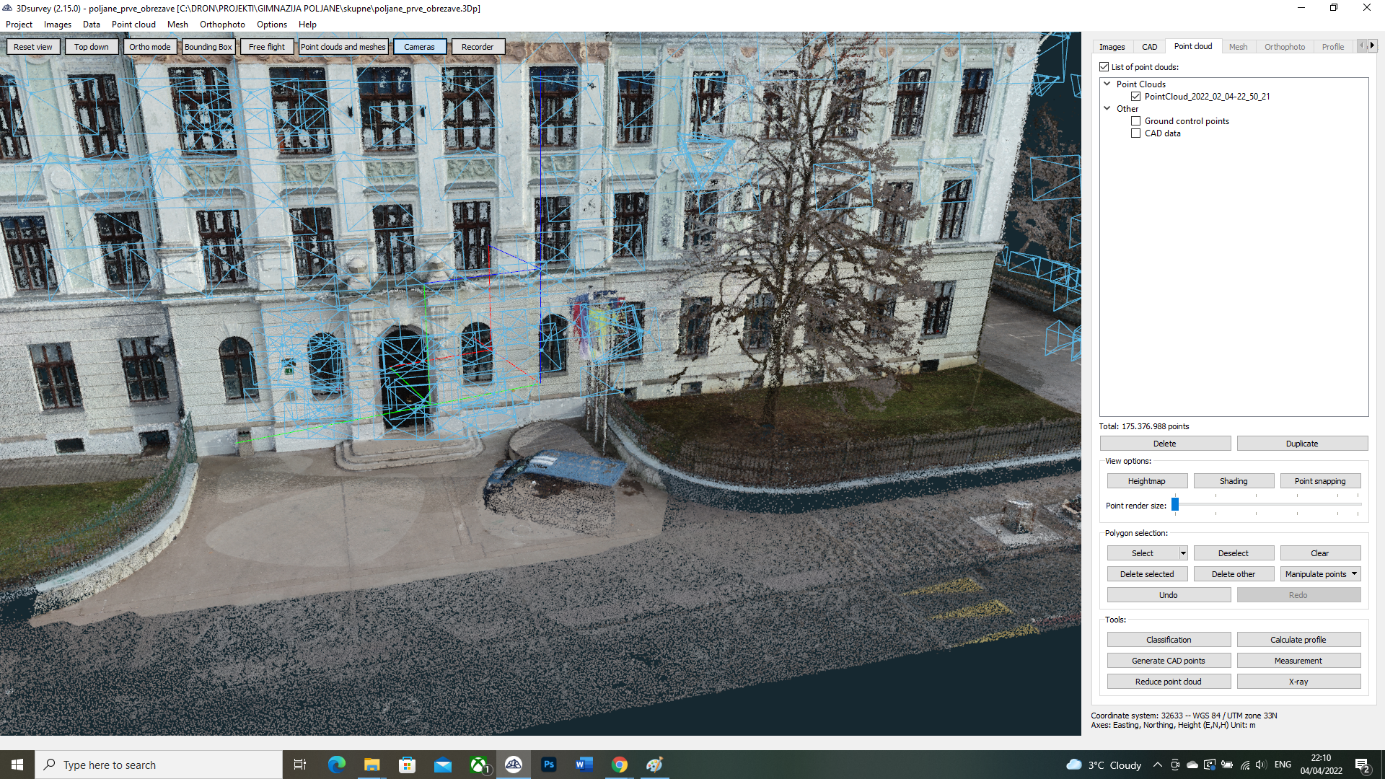
To get good results with building fronts and façades, we advise you get your scans done in layers.
Try to get a few different camera trajectories. For instance, 6m from the façade and then 3m from the façade. We advise not to take photos too close to the front with too big of an overlap. We’ve noticed that in cases where the features captured are too similar, some shots might get misplaced. To avoid that is to not capture it from a 90 degree angle, but instead try to capture the features from upside down, about 60 – 70 degrees on the Y-axis and about 25 degrees on the X-axis. That way you’ll get more depth from your objects, shades will be more visible, and you’ll be able to capture the details more accurately.
Planning ahead
Another thing I’d like to point out is that you shouldn’t forget about the details and that you should plan ahead.
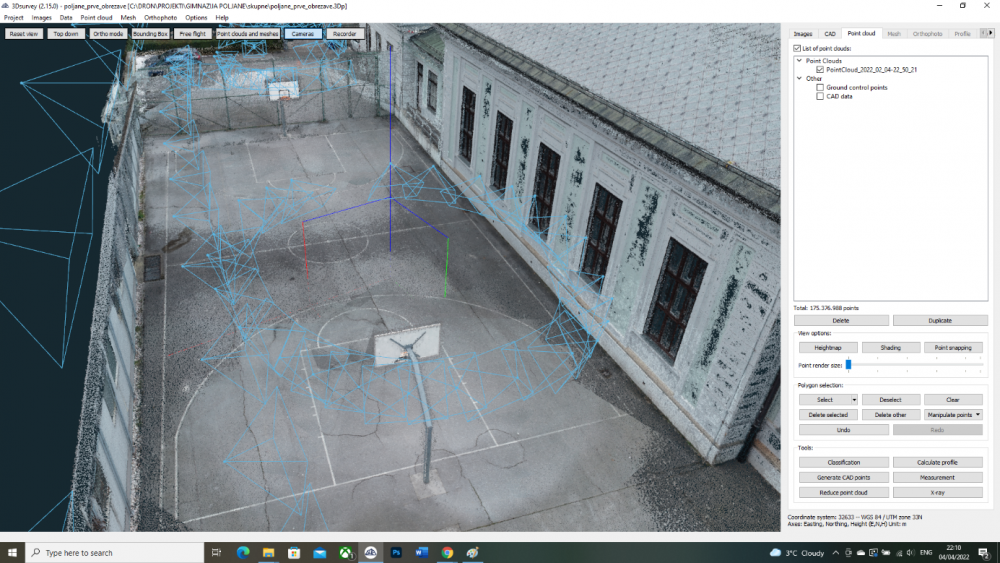
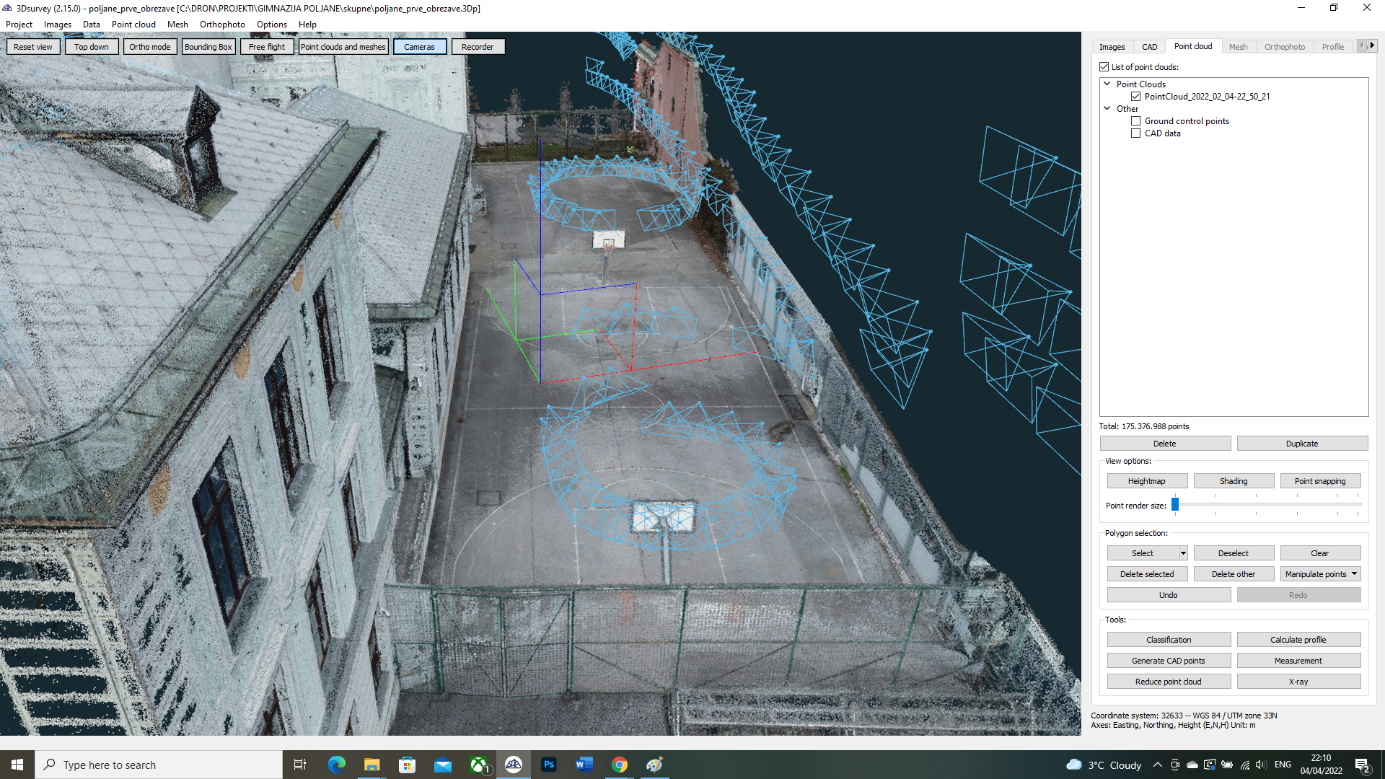
The basketball court in the back is a vast, empty space but very important for the target audience, i.e., future high school students. We didn’t forgot about the basketball hoops and planned ahead to devote a few shots to them as well.
Long, thin, and shiny objects such as metal rods, chimneys, and basketball hoops (in this case), are especially hard to capture. There is likely to be some ‘spray’ and those objects will never be rendered as perfect, big, solid objects. The light bounces off them a lot. Luckily you can trim a lot of spray down with 3Dsurvey’s tools. They come very handy.
Word of advice: use the ‘Bounding box’ tool. I wrote about it in the article here: https://www.3dsurvey.si/case-studies/3d-documentation-jurklosters-monastery. You’ll save a lot of time using this tool.
3Dsurvey had no problems registering the captured images and placing them into the total project even though they were far apart from the rest of the batch.
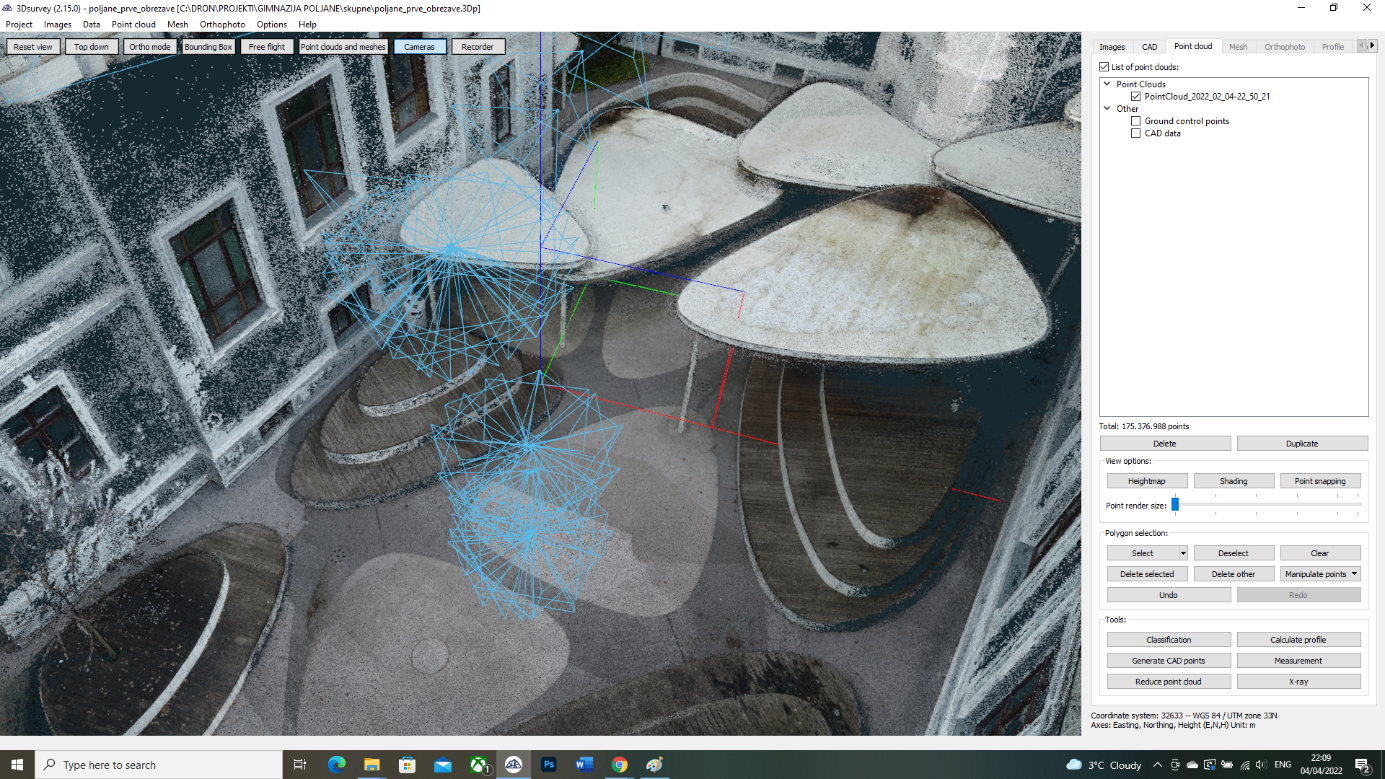
Enclosed yard
The last thing to point out in this case study was the enclosed yard area. The building is devised in such a way that it was hard to access all the area in order to capture the photos. If you don’t pay attention to all the areas of your subject, then you’ll get blurry parts (if you’re lucky) or even holes in the façade.
Here’s how we resolved the issue: by capturing photos on the Y-axis and taking the photos in 360 degrees on different parts and from a different height.
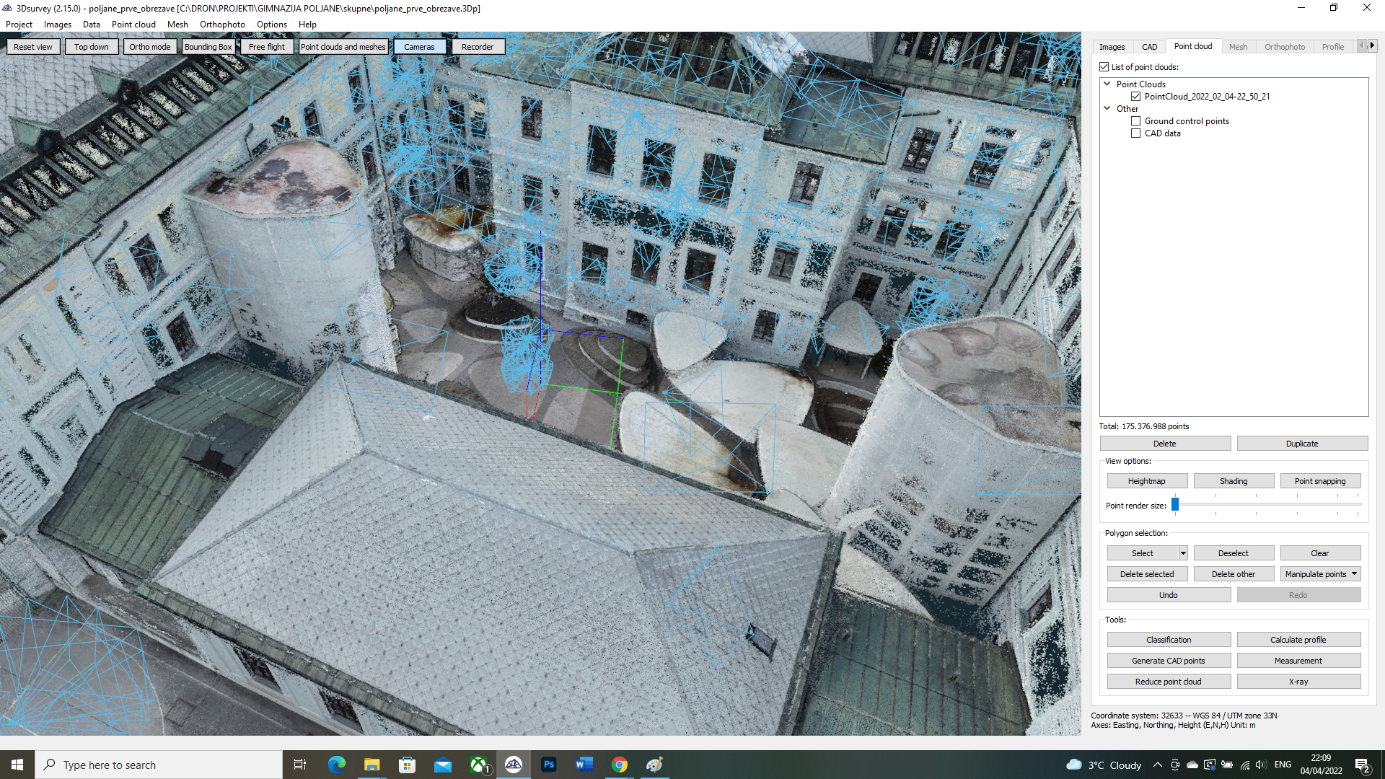
Our clients and our team were very happy with the final results. Once again, the fantastic software by 3Dsurvey proved that it can handle large data and complicated orientations.
The entire school was later exported to .obj and .ply files which we used to make the final product.
To experience a 3D virtual walk of school environments by 3Dpro, click here: https://3dpro.si/virtualni-sprehodi-za-izobrazevalne-ustanove/.
Written by:
Jano Komac, founder at www.Mediapro.si and www.3Dpro.si